Skip to content

Sticky Sesame Chicken – Fast, Crispy, and Better Than Takeout!

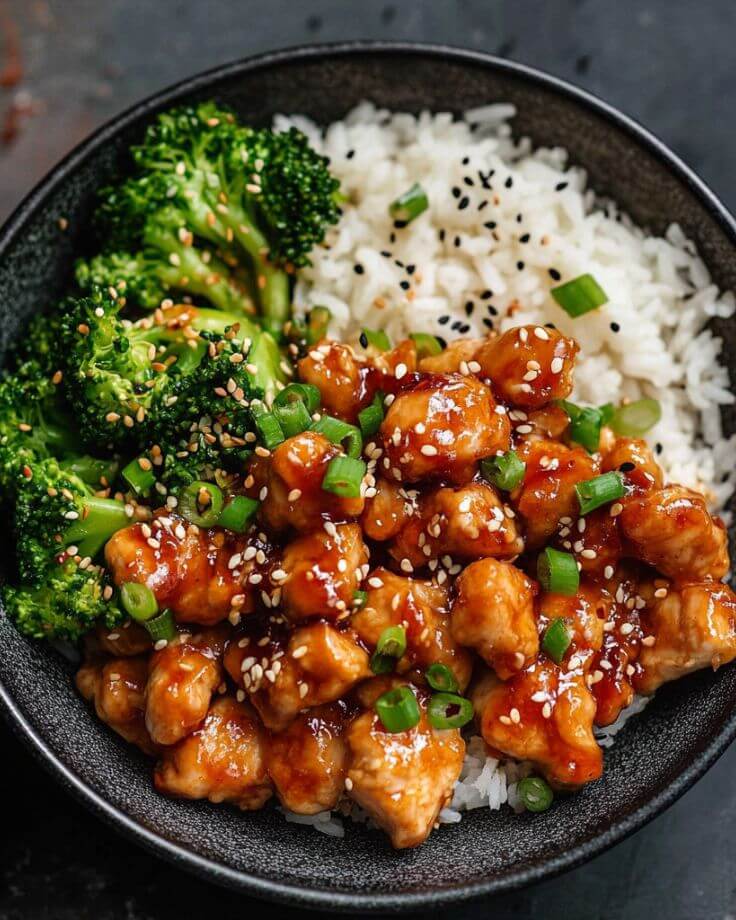
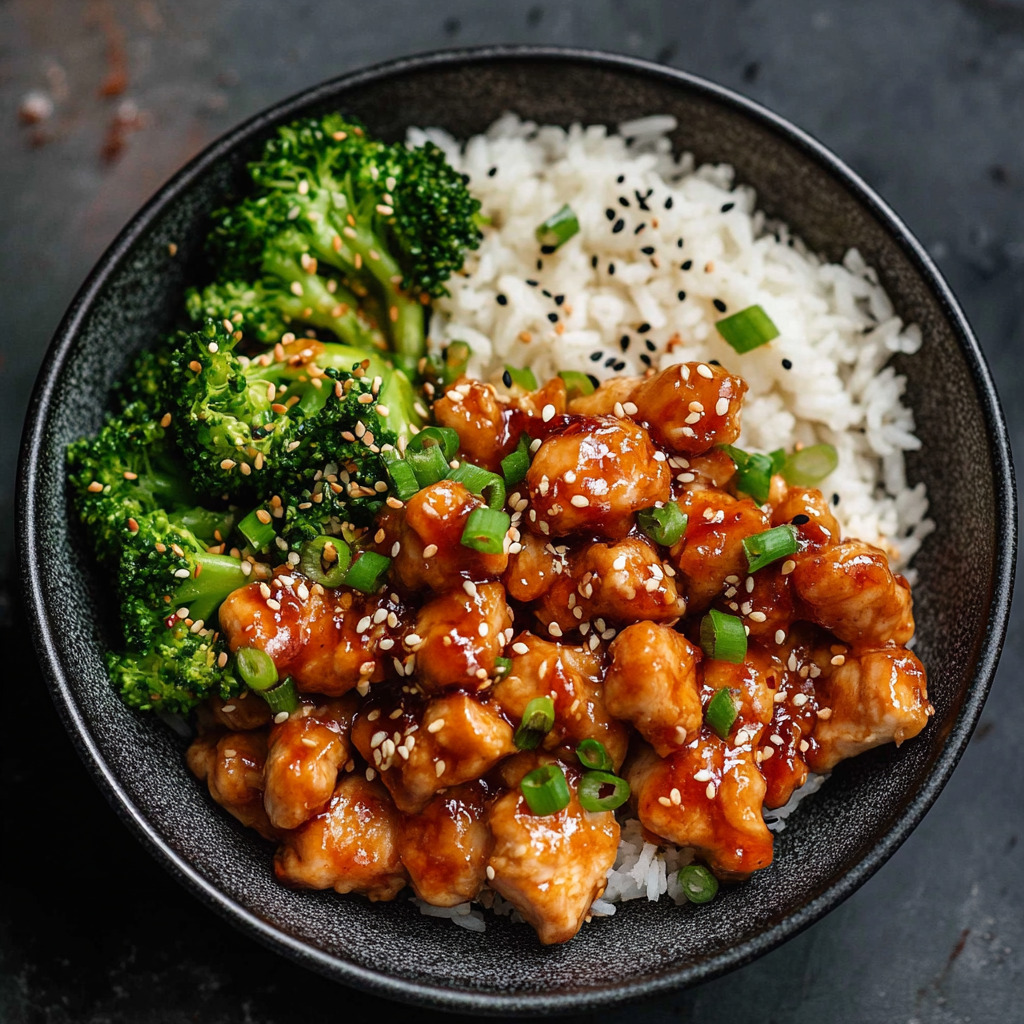
There’s something so satisfying about making Sticky Sesame Chicken at home. Watching the chicken turn golden and crispy in the pan, then tossing it in a glossy sesame sauce until every piece is coated, is almost as rewarding as the first bite.
It’s the kind of dinner that feels like a takeout treat but comes together with simple ingredients you probably already have in your kitchen.
We’ve been making this recipe on busy weeknights because it’s quick, reliable, and always disappears from the table.
The chicken stays wonderfully crisp beneath the sticky, sweet-and-savory glaze, making every bite packed with flavor. Serve it over a bowl of warm white rice, finish with sesame seeds and green onions, and enjoy a homemade meal that’s every bit as satisfying as your favorite takeout order.

For the Chicken
- Chicken Breasts – Boneless, skinless chicken breasts are cut into bite-sized pieces so they cook quickly and develop a crisp coating. You can also substitute boneless chicken thighs if you prefer juicier, darker meat.
- Eggs – The eggs help the flour and cornstarch stick to the chicken, creating a coating that turns golden and crispy as it cooks.
- Flour – A light coating of flour gives the chicken structure and works together with the cornstarch for the perfect crunchy exterior.
- Cornstarch – The secret to extra-crispy chicken. It creates a light, crunchy crust that stays crisp even after being coated in the sauce.
- Vegetable Oil – Used for pan-frying the chicken until it’s golden brown. Choose a neutral oil with a high smoke point, such as vegetable or canola oil.
- Cooked White Rice – The perfect base for soaking up every drop of the sticky sesame sauce. Freshly cooked jasmine or long-grain rice both work well.
- Sesame Seeds – A simple garnish that adds a light nutty flavor and gives the finished dish its classic sesame chicken look.
- Green Onions – Fresh chopped green onions add a pop of color and a mild onion flavor that balances the richness of the sauce.
For the Sauce
- Honey – The main source of sweetness that gives the sauce its signature sticky, glossy finish.
- Ketchup – Adds a touch of tanginess and richness while helping create the deep color of the sauce.
- Sugar – Provides additional sweetness and helps the sauce caramelize slightly as it cooks.
- Brown Sugar – Adds a subtle molasses flavor that gives the sauce extra depth and balances the savory ingredients.
- White Vinegar – Brightens the sauce with a little acidity, keeping the sweet flavors from becoming overpowering.
- Soy Sauce – Brings the savory, umami flavor that makes the sauce taste just like your favorite takeout version.
- Toasted Sesame Oil – Adds a rich, nutty sesame flavor that’s essential for authentic sesame chicken.
- Salt – Enhances all the flavors in the sauce. Since soy sauce is already salty, only a small amount is needed.
- Garlic Powder – Gives the sauce a rich garlic flavor that blends smoothly throughout without needing fresh garlic.
- Cold Water – Mixed with cornstarch to create a slurry that thickens the sauce evenly.
- Cornstarch – Whisked with water and stirred into the simmering sauce to create a thick, glossy coating that clings to every piece of chicken.
Sticky Sesame Chicken
Ingredients
For the Chicken
- 4 boneless, skinless chicken breasts, cut into 1 ½-inch pieces
- 2 eggs, whisked
- 6 tbsp flour
- 3 tbsp corn starch
- 4 tbsp tablespoons vegetable oil
- 3-4 cups cooked white rice (for serving)
- Sesame seeds (for garnish)
- Green onions, chopped (for garnish)
For the Sauce
- 6 tbsp honey
- 4 tbsp ketchup
- 3 tbsp sugar
- 1 tbsp brown sugar
- 2 tbsp white vinegar
- 3 tbsp soy sauce
- 1 tbsp toasted sesame oil
- ½ tsp salt
- 1 tbsp garlic powder
- 1 tbsp cold water
- 2 tbsp corn starch
Instructions
Make the Sauce
- In a bowl, whisk together honey, ketchup, sugar, brown sugar, white vinegar, soy sauce, sesame oil, salt, and garlic powder until smooth. Set aside.
Crisp Up the Chicken
- Get three separate bowls: one for the whisked eggs, one for flour, and one for corn starch.
- Dip each piece of chicken into the egg, then into the flour (coat it well!), and finally into the corn starch (for extra crispiness).
- Heat the oil in a large skillet over medium heat. Add chicken and cook, stirring occasionally, until golden brown and fully cooked (about 5-10 minutes).
- Remove the chicken with a slotted spoon and transfer it to a plate lined with paper towels.
Make It Saucy
- Wipe out excess oil from the pan using a folded paper towel.
- Pour in the prepared sauce and bring it to a gentle boil over medium heat.
- In a small bowl, whisk together corn starch and water until dissolved, then stir it into the bubbling sauce to thicken it up.
- Reduce heat to medium-low, return the crispy chicken to the pan, and toss until every piece is glossy, sticky, and fully coated in that delicious sauce.
Time to Eat!
- Serve over fluffy white rice, sprinkle with sesame seeds and green onions, and dig in.
Notes
Nutrition

1. Can I use chicken thighs instead of chicken breasts?
Absolutely! I’ve made this with both chicken breasts and boneless, skinless chicken thighs, and both turn out wonderfully. Chicken breasts stay lean and tender, while thighs are a little juicier and more forgiving if they’re cooked a touch longer. Use whichever you prefer—or whatever you already have in the fridge.
2. How do I keep the chicken crispy after adding the sauce?
The trick is to let the chicken get nicely golden before you add the sauce. Once the sauce has thickened, toss the chicken through just until it’s evenly coated. It’ll stay crisp around the edges while soaking up all that sticky sesame goodness. For the crispiest results, serve it straight away.
3. Can I make the sauce ahead of time?
Yes! Simply whisk the sauce ingredients together and keep them in the refrigerator for up to 3 days. When you’re ready to cook, pour the sauce into the pan, bring it to a gentle simmer, then stir in the cornstarch slurry to thicken. It’s a great shortcut for busy weeknights.
4. What should I serve with Sticky Sesame Chicken?
Steamed white rice is my first choice because it soaks up every drop of that glossy sauce. If you’d like to round out the meal, add a side of steamed broccoli, snap peas, bok choy, or your favorite stir-fried vegetables. A sprinkle of sesame seeds and green onions on top finishes it off perfectly.
5. Can I store and reheat leftovers?
Yes! Store leftovers in an airtight container in the refrigerator for up to 3 days. Reheat gently in a skillet over medium-low heat or in the microwave until warmed through. The coating won’t be quite as crispy as when it’s freshly made, but the chicken will still be delicious and the sauce will be just as flavorful.