
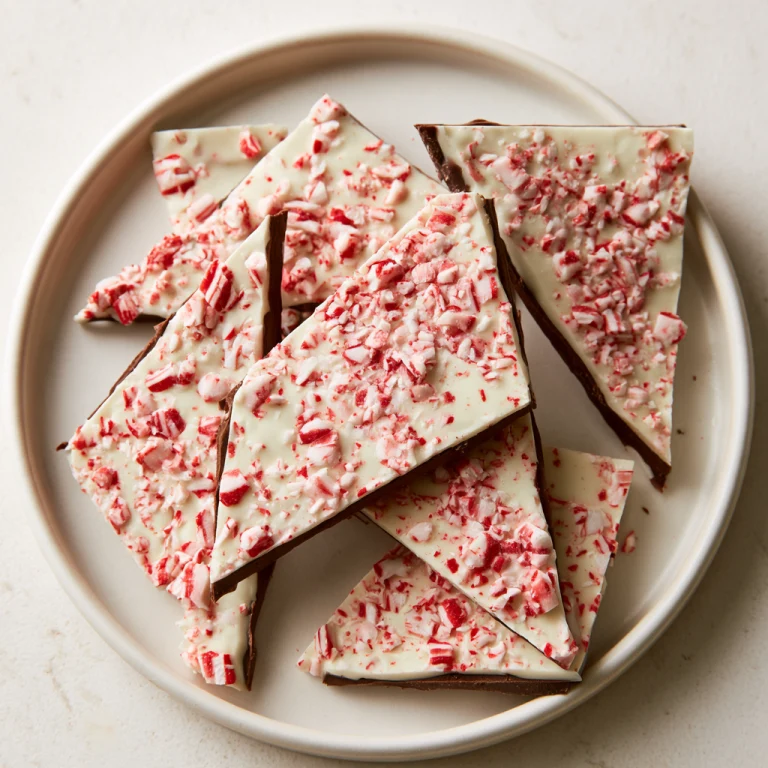
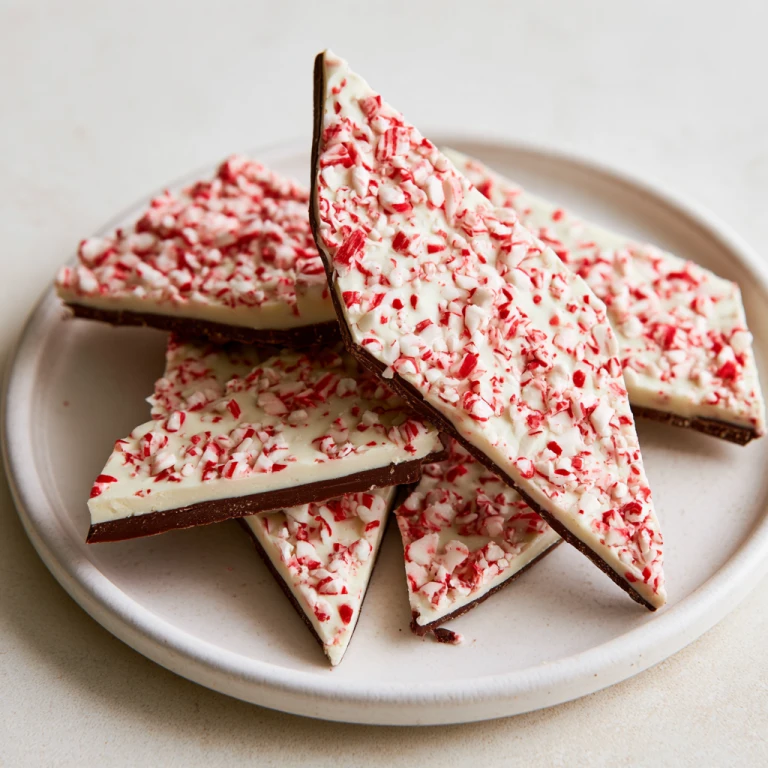
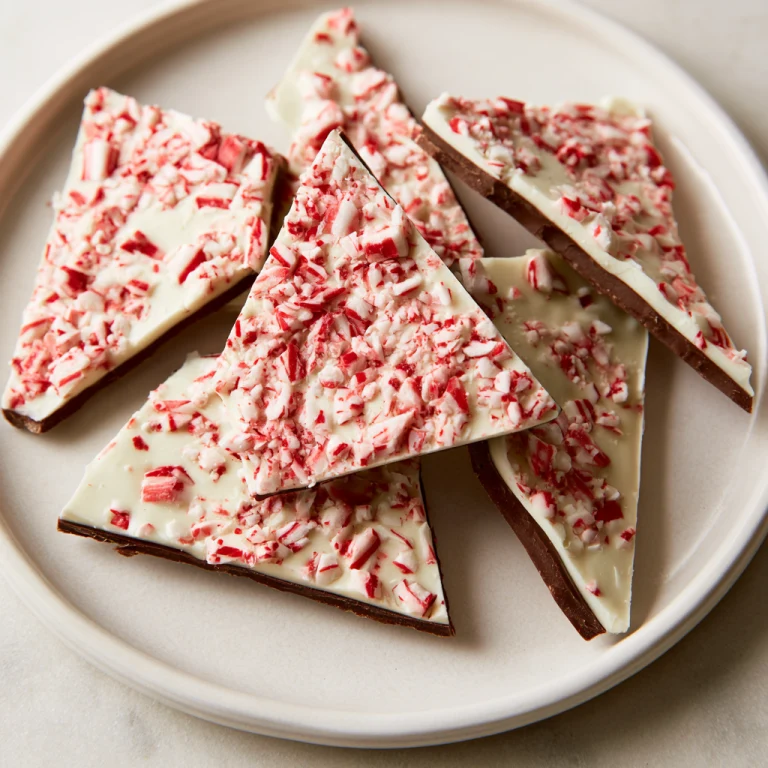
Creamy white chocolate, rich dark chocolate and a cool hint of peppermint, all stacked in three layers and showered with crushed candy canes.
This homemade peppermint bark is no-bake, easy to make, and the ultimate Christmas candy gift.
Let’s talk about why homemade peppermint bark beats the boxed stuff.
You get to use really good chocolate, so it tastes rich and creamy rather than waxy.
A touch of peppermint extract in the bottom two layers gives a fresh, wintry flavour,
and the crushed candy canes on top add crunch and that classic red-and-white look.
The three layers are the fun part. White chocolate on the bottom, a semi-sweet chocolate middle and more white chocolate on top. Each layer is chilled until it’s almost set before the next goes on, and that’s the trick that stops them sliding apart.
It’s perfect for holiday gift tins, cookie trays, teacher presents and stocking stuffers.
Why You’ll Love This Peppermint Bark
- No baking: just melt, spread and chill.
- Three pretty layers: white, dark and white with candy cane on top.
- Better than store-bought: good-quality chocolate makes all the difference.
- Great for gifting: it keeps for up to 3 weeks in the fridge.
- Easy to scale up: double or triple it on a baking sheet for a crowd.
Ingredient Notes & Easy Substitutions
White chocolate – Use good-quality bars and chop them coarsely. Chips, white morsels and candy melts contain stabilisers and don’t melt as smoothly, so they’re not recommended.
Semi-sweet or bittersweet chocolate – The rich middle layer. Again, use chopped bars rather than chips.
Vegetable or coconut oil – A little oil thins the melted chocolate so it spreads easily, and keeps the bark from being crumbly once set.
Peppermint extract – Goes into the bottom two layers. A little is plenty, as it’s strong.
Candy canes – Two or three regular-size canes, crushed, for the topping.
Step-by-Step Guide to Making Peppermint Bark
1. Line the pan
Line an 8 or 9-inch square pan with parchment or foil, smoothing out the wrinkles so the bark comes out flat. A lined baking sheet works if you’d like thinner bark.
2. Make the white bottom layer
Melt half the white chocolate with a little oil in 20-second bursts, stirring well each time. White chocolate burns easily, so short bursts are key. Stir in some peppermint extract, spread it thinly in the pan and chill for 10 to 15 minutes, until it’s almost set but not rock hard.
3. Add the chocolate middle layer
Melt the semi-sweet chocolate the same way, stir in the rest of the peppermint, and spread it over the white layer. Back in the fridge for another 10 to 15 minutes.
4. Finish with white chocolate and candy canes
Melt the remaining white chocolate with the last of the oil and spread it on top. Sprinkle the crushed candy canes evenly over it straight away, while it’s still soft, so they stick.
5. Chill and break
Refrigerate for about an hour, until completely set. Lift it out, peel off the paper and break or cut it into pieces. If it’s been in the fridge for a long time, let it sit out for 10 to 15 minutes first so it cuts cleanly.
Three-Layer Peppermint Bark
Equipment
- 8-inch or 9-inch square pan (or a baking sheet)
- Parchment paper or aluminum foil
- Heatproof bowls or liquid measuring cups
- Silicone spatula
- Offset spatula
- Zip-top bag and rolling pin
Ingredients
- 12 ounces white chocolate 339 g, coarsely chopped, divided (see Note 1)
- 6 ounces semi-sweet or bittersweet chocolate 170 g, coarsely chopped
- 1 1/2 teaspoons vegetable oil or coconut oil divided
- 1/2 teaspoon peppermint extract divided
- 2-3 regular-size candy canes 24 to 36 g total, crushed
Instructions
- Line the base and sides of an 8- or 9-inch square pan with parchment or foil, smoothing out the wrinkles. A lined baking sheet works too.
Bottom layer
- Put 6 oz of the white chocolate and 1/2 tsp oil in a heatproof bowl. Microwave in 20-second bursts, stirring hard after each one, until completely smooth. Stir in 1/4 tsp peppermint extract.
- Spread it thinly and evenly in the pan (about 8 x 12 inches if using a baking sheet). Refrigerate for 10 to 15 minutes, until almost but not completely set, so the layers stick together.
Middle layer
- Melt the semi-sweet chocolate with 1/2 tsp oil the same way. Stir in the remaining 1/4 tsp peppermint extract.
- Pour over the white layer, spread smooth, and refrigerate for 10 to 15 minutes, until almost set.
Top layer
- Melt the rest of the white chocolate with the last 1/2 tsp oil (no peppermint in this layer). Spread it over the other layers.
- Scatter the crushed candy canes evenly over the top. To crush them, seal the unwrapped canes in a zip-top bag and bash or roll with a rolling pin.
- Refrigerate for about 1 hour, until fully set. Lift out, peel off the liner and break or cut into pieces. If it has been chilling longer than 3 to 4 hours, leave it at room temperature for 10 to 15 minutes first.
Notes
- Chocolate: Use good-quality chocolate bars (such as Ghirardelli, Guittard or Baker's), not chips, white morsels or candy melts.
- Why oil: It thins the chocolate so it spreads easily, and keeps the set bark slightly softer rather than crumbly.
- Double boiler: You can melt each layer over barely simmering water instead of in the microwave.
- Tempering: Optional. Tempered chocolate gives a harder bark with a snap.
- Two layers only: Use about 8 oz of each chocolate, letting the bottom layer almost set before adding the top.
- Bigger batch: Double or triple everything and use a large lined baking sheet; the steps and timings stay the same.
- Storage: Keep covered in the fridge for up to 3 weeks. In cold weather it can sit at room temperature for a few days, but it softens.
- Nutrition: Estimated per 1-oz piece from the ingredients.
Nutrition
Tips for the Best Peppermint Bark
- Use chocolate bars, not chips: they melt smoother and taste better.
- Melt in short bursts: 20 seconds at a time, stirring hard between each.
- Don’t let layers fully set: almost set is the sweet spot so the layers bond.
- Spread thinly: thinner bark is easier to break into neat pieces.
- Add candy canes quickly: sprinkle them on while the top layer is still soft.
- Temper for snap: if you like a hard, snappy bark, temper the chocolate.
Common Mistakes to Avoid
- Overheating the chocolate: it can seize or burn. Melt slowly in short bursts.
- Letting a layer set completely: the next one won’t stick and the bark can separate.
- Using candy melts or white chips: they don’t give the same creamy texture.
- Cutting it straight from a long chill: it can crack unevenly. Let it sit out 10 to 15 minutes.
- Storing it somewhere warm: it softens. Keep it covered in the fridge.
Easy Ways to Change It Up
The recipe card is the classic version. These are optional ideas:
- Two-layer bark: use about 8 oz of each chocolate for just a dark and a white layer.
- Dark chocolate: use bittersweet chocolate for a richer middle.
- Extra crunch: add crushed peppermint candies along with the candy canes.
- Big batch: double or triple the recipe on a large lined baking sheet.
How to Serve Peppermint Bark
Pile pieces onto a Christmas cookie tray or dessert board. Serve with hot chocolate or coffee. For gifts, pack it into cellophane bags or tins lined with parchment and tie with ribbon.
Make-Ahead and Storage Tips
- Make ahead: this bark keeps really well, so you can make it well before the holidays.
- Fridge: store covered in the refrigerator for up to 3 weeks.
- Room temperature: in cold weather it can sit out for a few days, but it will soften.
- Layering: separate pieces with parchment so they don’t stick together.
Frequently Asked Questions
Why did my peppermint bark layers separate?
Usually because a layer set completely before the next was added. Chill each layer only until it’s almost set.
Can I use white chocolate chips?
They’re not recommended. Chopped good-quality chocolate bars melt more smoothly and give a creamier bark.
Do I need to temper the chocolate?
No, it’s optional. Tempering gives a harder bark with a snap, but untempered bark is softer and still delicious.
How long does peppermint bark last?
Up to 3 weeks covered in the fridge.
How do I crush candy canes?
Put the unwrapped candy canes in a sealed zip-top bag and bash or roll them with a rolling pin.
Creamy, chocolatey and cool with peppermint, this homemade peppermint bark tastes like Christmas in every bite.
Make a big batch, keep some for yourself, and pack the rest into pretty tins for everyone on your list.