Skip to content


There are some days when nothing sounds better than brownies—simple, comforting, and familiar.
These cocoa powder brownies are the kind you make on a quiet afternoon when the craving hits and you don’t want to fuss with melting chocolate or running to the store.
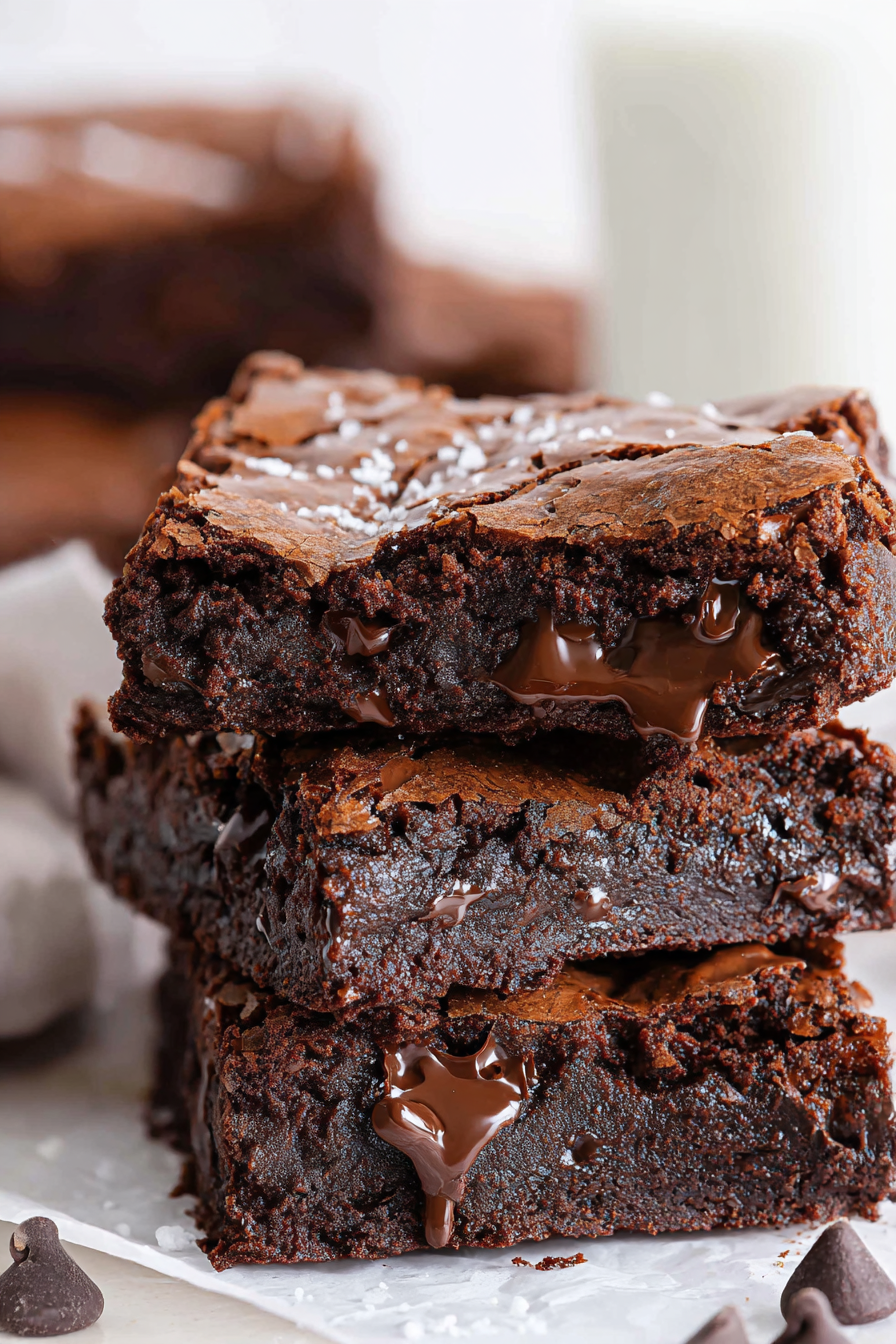
As they bake, the kitchen fills with that deep cocoa aroma, and before long you’re rewarded with a pan of rich, chewy brownies topped with glossy cracks and pockets of melted chocolate.
They’re made entirely from pantry staples and come together quickly.
But they taste like the brownies you remember most—the ones that feel nostalgic, indulgent, and just right.
This is the kind of dessert recipes you’ll come back to again and again, whether you’re baking for others or just for yourself.
Why You’ll Love This Recipe
There are plenty of brownie recipes out there, but this one deserves a permanent spot in your baking rotation. It delivers everything you want in a homemade brownie—rich chocolate flavor, a shiny crackly top, and a perfectly fudgy center—all without needing melted chocolate.
The best part? Everything comes together with everyday pantry ingredients, so there’s a good chance you can make them whenever the craving strikes. Whether you’re baking for family, taking dessert to a gathering, or simply treating yourself, these brownies are quick, reliable, and disappear fast.
For Cocoa Powder Brownies
- Granulated Sugar – This provides sweetness and helps create that classic crackly brownie top.
- Vegetable Oil – Keeps the brownies moist and fudgy instead of cakey.
- Milk – Adds moisture and helps smooth out the batter since there’s no melted chocolate.
- Vanilla Extract – Enhances the cocoa flavor and adds warmth.
- Egg – Binds everything together and gives the brownies structure.
- All-Purpose Flour – Just enough to hold the brownies together without making them dense or dry.
- Natural Unsweetened Cocoa Powder – The main source of chocolate flavor, giving these brownies a deep, rich cocoa taste.
- Baking Soda – Helps the brownies rise slightly so they’re chewy, not flat.
- Salt – Balances the sweetness and sharpens the chocolate flavor.
- Semi-Sweet Chocolate Chips – Melt into the batter for pockets of chocolate and add texture throughout.
- Flaky Sea Salt (Optional) – A finishing touch that enhances the sweetness and adds contrast.

How to Make These Cocoa Powder Brownies
Making these brownies couldn’t be much easier. A couple of bowls, a whisk, and one baking pan are all you need.
1. Prepare the pan
Preheat your oven to 350°F. Grease an 8-inch square baking pan well, then line it with parchment paper. This makes lifting the brownies out much easier once they’ve cooled.
2. Mix the wet ingredients
In a medium bowl, stir together the granulated sugar, vegetable oil, milk, and vanilla extract until smooth. Add the egg and mix for about 30 seconds, just until incorporated.
3. Add the dry ingredients
In another bowl, whisk together the all-purpose flour, cocoa powder, baking soda, and salt. Add the dry ingredients to the wet mixture and stir until just combined. Fold in the semi-sweet chocolate chips with a spatula, taking care not to overmix.
4. Bake
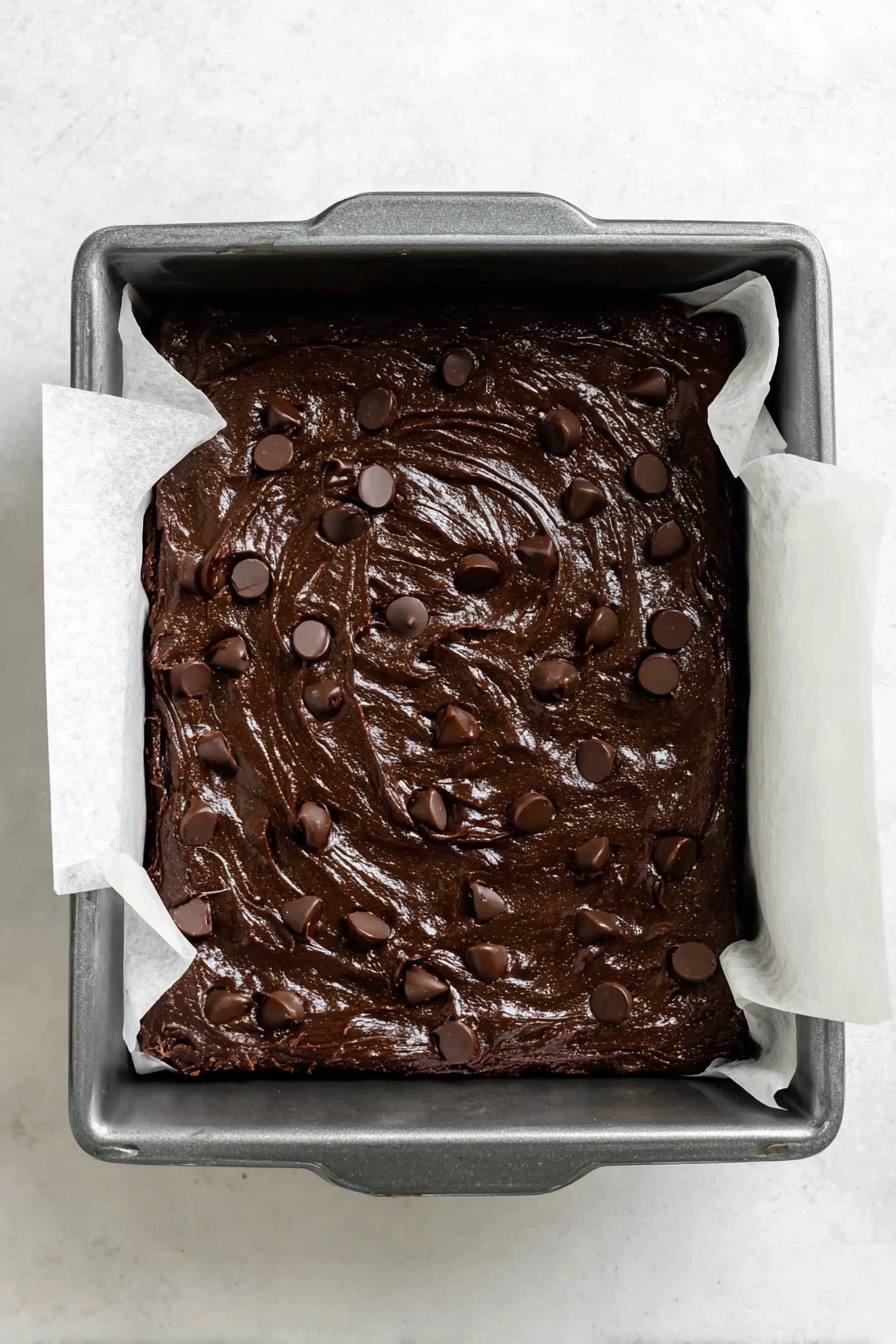
Spread the batter evenly into the prepared pan and sprinkle a handful of additional chocolate chips over the top. Bake for 25 to 30 minutes, or until a toothpick inserted into the center comes out with moist crumbs but no wet batter. Let the brownies cool completely before slicing for the cleanest edges and the best texture.
Tips and Variations
- Trust the toothpick, not the timer. Ovens vary, so begin checking near the end of the baking time. You’re looking for moist crumbs rather than wet batter.
- A metal baking pan gives the best results. It bakes more evenly and helps create the perfect chewy texture.
- Using a 9-inch pan? Start checking a few minutes earlier since the brownies will be slightly thinner.
- Finish with flaky sea salt if you enjoy a sweet-and-salty contrast that makes the chocolate flavor pop.
- Want to customize them? Stir in chopped nuts, extra chocolate chips, or caramel bits. Just keep the add-ins moderate so the brownies bake evenly.
- Butter can replace the oil if preferred. The brownies will have a richer flavor, though they’ll be a little less fudgy than the original version.
How to Serve
These brownies are wonderful all on their own, but they’re even better with a few simple extras. Enjoy one with a cold glass of milk, a hot cup of coffee, or your favorite tea for an afternoon treat.
Warm a brownie for a few seconds in the microwave and top it with a scoop of vanilla ice cream for an easy dessert that’s always a crowd-pleaser.
They’re also perfect for lunchboxes, bake sales, holiday dessert trays, or sharing with friends and family. And if you happen to have leftovers, they’ll stay delicious for days—though there’s a good chance they won’t last that long!
1. Can I use butter instead of oil?
Yes, you can. Melt it first and let it cool slightly, then use it in place of the oil. The brownies will taste a little richer, but they’ll be slightly less fudgy than when made with oil. Still very good though — no bad choices here.
2. How do I know when the brownies are done?
Forget the clock — the toothpick test is your best friend here. Stick a toothpick into the middle and look for moist crumbs, not wet batter. If it comes out clean, they’re overbaked. If it’s gooey, give them a few more minutes.
3. Can I add extra mix-ins?
Absolutely. Nuts, extra chocolate chips, or even a handful of caramel bits all work well. Just don’t go overboard — too many add-ins can throw off the bake and stop the brownies from cooking evenly.
4. Is parchment paper really necessary?
Not essential, but highly recommended. It makes lifting the brownies out of the pan effortless and keeps the edges neat. If you skip it, be sure to grease the pan very well.
5. How should I store leftovers?
Keep brownies in an airtight container at room temperature for up to 3 days, or in the fridge for up to 5 days. They also freeze beautifully — wrap individually and microwave briefly straight from frozen when the craving hits.
Best Brownies Recipe
Notes
Ingredients
- 1 ¼ cups (238g) granulated sugar
- 1/3 cup (78ml) vegetable oil
- ¼ cup (59ml) milk
- 2 teaspoons (10ml) pure vanilla extract
- 1 large egg
- 1 cup (140g) all-purpose flour
- ½ cup (40g) natural unsweetened cocoa powder
- ¼ teaspoon baking soda
- 1/2 teaspoon salt
- ¾ cups (168g) semi-sweet chocolate chips, plus additional for garnish
- Flakey sea salt, for garnish (optional)
Instructions
- Heat the oven to 350°F. Thoroughly grease an 8-inch square baking pan, then line it with parchment paper.
- In a medium bowl, mix the granulated sugar, vegetable oil, milk, and vanilla extract until smooth and fully blended.
- Add the egg and mix just until incorporated, about 30 seconds.
- In a separate bowl, whisk together the flour, cocoa powder, baking soda, and salt. Add the dry mixture to the wet ingredients and stir until just combined. Gently fold in the chocolate chips using a spatula.
- Transfer the batter to the prepared pan, spreading it evenly. Sprinkle a small handful of additional chocolate chips over the surface. Bake at 350°F for 25–30 minutes. When tested with a toothpick in the center, it should come out damp but not wet or gooey. Remove from the oven and allow the brownies to cool before slicing.
- Baking time: Some ovens may require slightly longer baking. Use the toothpick test to judge doneness rather than relying solely on time. A metal pan works best. If using a 9-inch pan, begin checking a few minutes early.
- Storage: Keep brownies in an airtight container at room temperature for up to 3 days, or refrigerate for up to 5 days.
- Freezing: Wrap brownies individually in plastic wrap. Thaw at room temperature, in the refrigerator, or warm briefly in the microwave for 15–30 seconds.
If you enjoyed these brownies, be sure to browse our other easy dessert recipes. You’ll find plenty of homemade treats that are just as simple and just as irresistible.