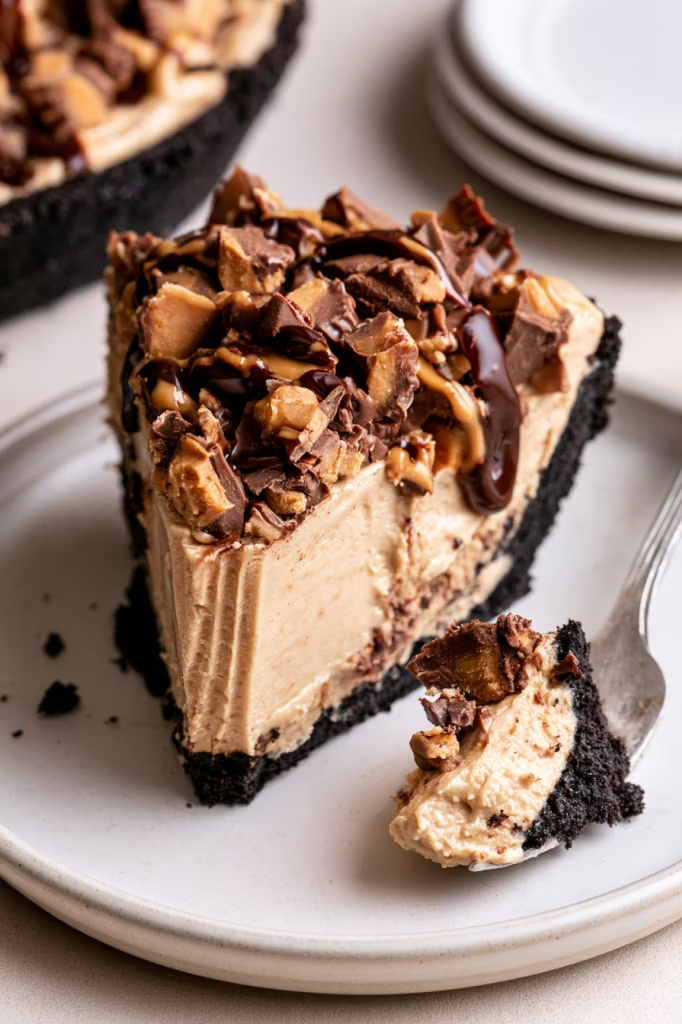
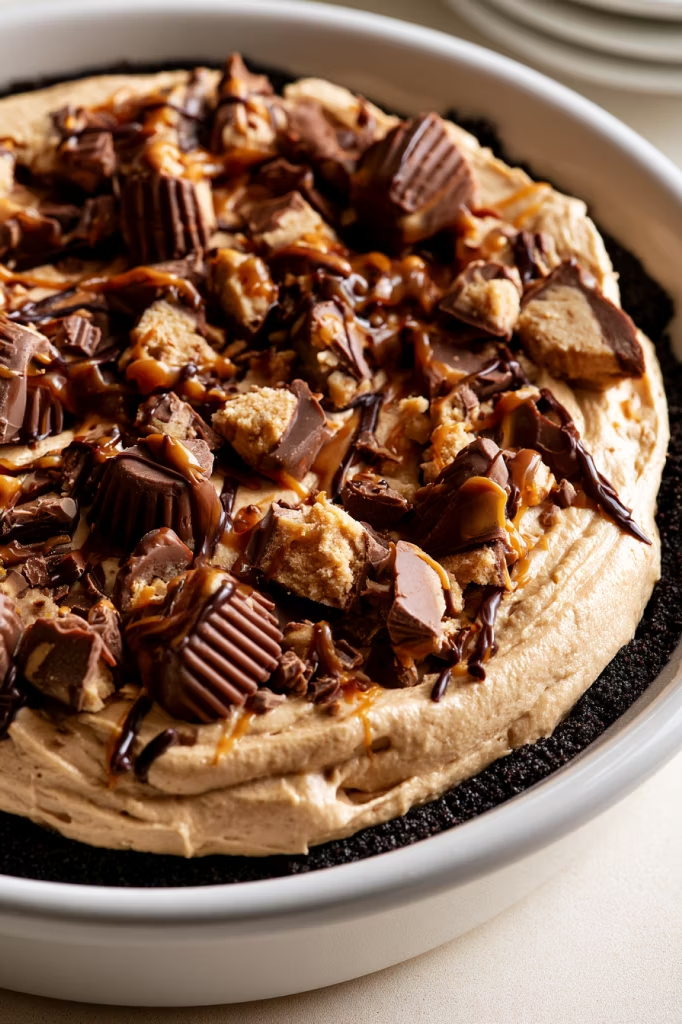
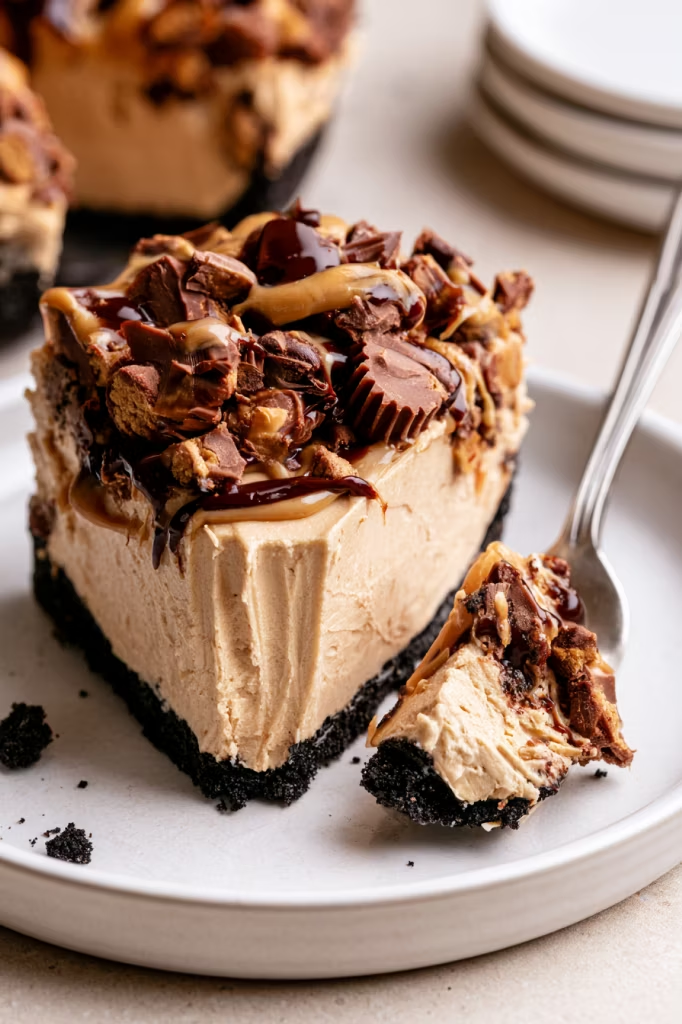
With a crisp chocolate crust, a fluffy peanut butter filling, and chocolate and peanut butter drizzled over the top, this Peanut Butter Pie is the kind of dessert that disappears quickly once you set it on the table.
There are some desserts I want to spend an afternoon making, and then there are the ones I want to be wonderfully simple. This pie falls into the second camp. The chocolate crust comes together quickly in the food processor, and while it cools, you can make the creamy peanut butter filling.
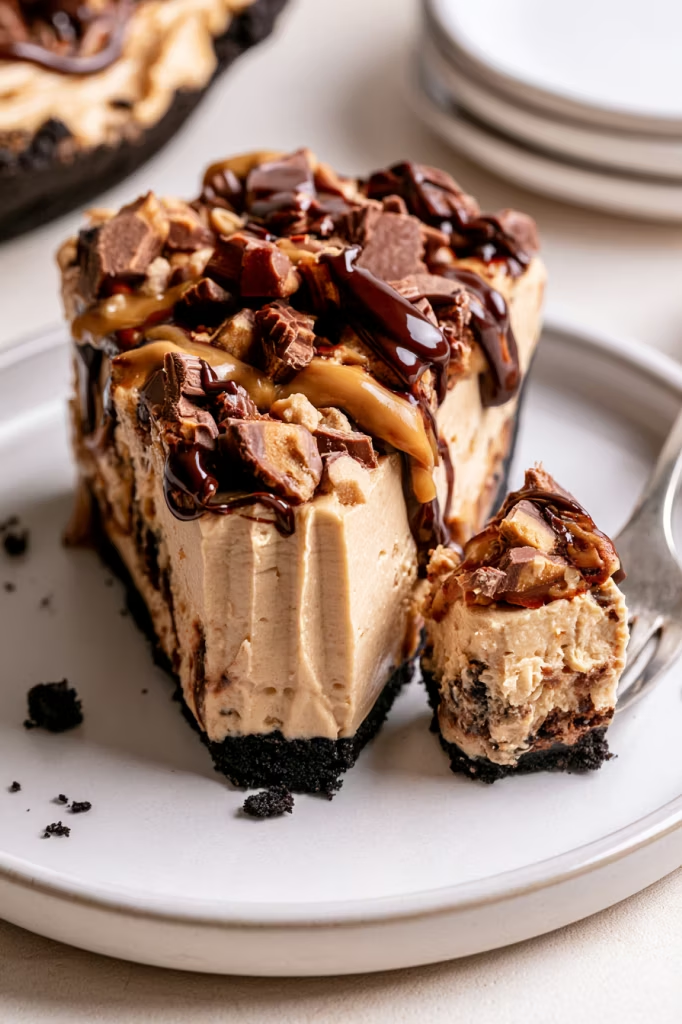
What I especially love about this pie is the texture. Cream cheese and peanut butter make the filling rich and creamy, while freshly whipped cream keeps it surprisingly light. After a few hours in the fridge or freezer, it sets into a cool, sliceable dessert with a crunchy chocolate crust underneath.
Finish it with melted chocolate, melted peanut butter, mini Reese’s cups, and peanut butter chips, and you have a dessert made for anyone who thinks chocolate and peanut butter belong together.
Why You’ll Love This Peanut Butter Pie
This pie has plenty going for it, but the combination of easy preparation and an extra-creamy filling is what makes me want to make it again.
It’s wonderfully creamy. The peanut butter and cream cheese create a rich base, and folding in whipped heavy cream gives the filling a lighter, fluffier texture.
Chocolate + peanut butter. A chocolate graham cracker crust, creamy peanut butter filling, and chocolate drizzle give you that classic combination from the first bite to the last.
You can make it ahead. Because the pie needs several hours to set, it’s an ideal dessert to prepare earlier in the day—or before you need it—and leave chilling until serving time.
No Cool Whip needed. Heavy whipping cream is whipped from scratch and folded into the filling, so you still get that airy texture without using prepared whipped topping.
The toppings are part of the fun. Drizzles of melted chocolate and peanut butter plus mini Reese’s cups and peanut butter chips make the finished pie feel a little extra without adding a complicated decorating step.
You can serve it chilled or frozen. Keep it refrigerated for a softer, creamier slice, or serve it frozen when you want the filling firmer.
Peanut Butter Pie Ingredients
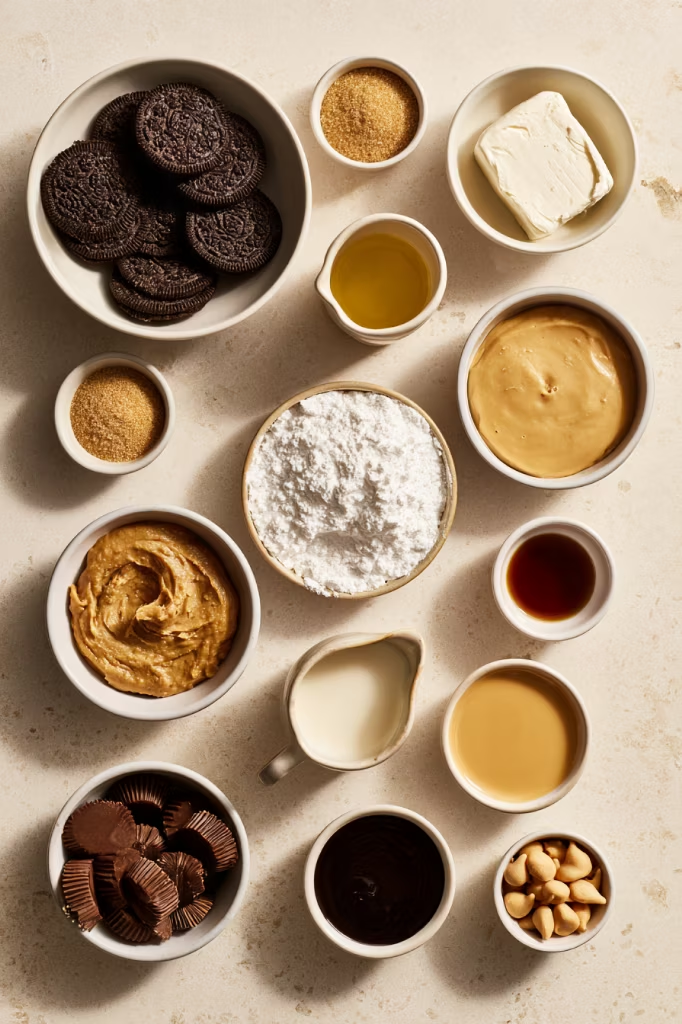
You only need a handful of ingredients to make this creamy peanut butter pie. Here’s what each one brings to the recipe.
For the Chocolate Crust
- Chocolate Graham Crackers – These create the chocolatey, crunchy base for the pie and pair perfectly with the peanut butter filling.
- Light Brown Sugar – Adds a little extra sweetness to the crust and complements the chocolate flavor.
- Unsalted Butter – Melted butter moistens the crumbs and helps them hold together once the crust is pressed into the pie plate and baked.
For the Peanut Butter Filling
- Cream Cheese – This gives the filling its creamy texture and a slight tang that balances the sweetness. Make sure it’s at room temperature so it blends smoothly.
- Powdered Sugar – Sweetens the peanut butter filling while keeping it smooth. It’s divided between the cream cheese mixture and whipped cream.
- Creamy Peanut Butter – The star of the pie! It gives the filling its rich peanut butter flavor and contributes to its thick, creamy consistency.
- Heavy Whipping Cream – Whipping the cream before folding it into the peanut butter mixture makes the filling light, fluffy, and almost mousse-like.
- Vanilla Extract – A little vanilla rounds out the peanut butter and cream cheese flavors.
For the Topping
- Melted Peanut Butter – Drizzled over the finished pie for an extra layer of peanut butter flavor.
- Melted Chocolate – Adds a chocolate drizzle that pairs naturally with the peanut butter filling.
- Mini Reese’s Cups – These make the pie extra fun and add little bites of chocolate and peanut butter on top.
- Peanut Butter Chips – Sprinkle these over the pie for even more peanut butter flavor and a little extra texture.
Ingredient Tip: If you use natural peanut butter, stir it extremely well before measuring so the oil is completely incorporated and there are no dry pockets. Conventional creamy peanut butter works well, too.
Step-by-Step Instructions
Let’s make the pie!
Preheat the oven to 325°F.
First, make the chocolate crust.
In the bowl of a food processor, process the crackers and sugar until finely ground. Add the butter and pulse until moistened. Use the bottom of a measuring cup, glass, or ramekin to press the crust mixture into the bottom and up the sides of a 9-inch pie plate. Bake until fragrant, about 10 to 12 minutes. Cool completely on a wire rack.
You want to give the crust enough time to cool before adding the filling. While it cools, you can move on to the peanut butter layer.
Next, make the peanut butter filling.
In a large bowl, use an electric mixer to beat the cream cheese, 3/4 cup powdered sugar, and the peanut butter until light and fluffy, about 3 minutes.
In a separate bowl, use an electric mixer with the whisk attachment to whip the heavy cream until thick and light. Add in the remaining 2 tablespoons of powdered sugar and the vanilla extract and continue to whip until stiff peaks form.
Gently fold the whipped cream into the peanut butter mixture. Pour into the prepared pie shell and freeze for 3 hours or chill in the fridge at least 6 hours.
Finally, add the toppings.
Place your melted peanut butter and melted chocolate in separate resealable bags or piping bags. Snip off a tiny corner of the bag’s tip. Squeeze slightly to drizzle the melted peanut butter and melted chocolate over your pie. Top with mini Reese’s cups and peanut butter chips. Serve frozen or refrigerated.
Store in the fridge, covered, for up to 3 days, or in the freezer for up to 1 month.
Expert Tips
This recipe is simple, but a few small details will help you get that creamy, fluffy filling and neat chocolate crust every time.
Start with softened cream cheese. Room-temperature cream cheese is much easier to beat until smooth and fluffy. Cold cream cheese can leave little lumps throughout the filling.
Let the crust cool completely. The peanut butter filling is meant to stay cool, so don’t rush this part. Give the baked chocolate crust time to reach room temperature before filling it.
Whip the cream to stiff peaks. The whipped cream gives the filling much of its light texture. When you lift the whisk, the peak should stand rather than immediately folding back into the bowl.
Fold gently. Instead of beating the whipped cream into the peanut butter mixture, fold the two together carefully. This helps preserve the air you just whipped into the cream.
Give the pie time to set. It needs 3 hours in the freezer or at least 6 hours in the refrigerator. That chilling time is what transforms the soft filling into a pie you can slice.
Stir natural peanut butter very well. If you choose natural peanut butter, make sure the oil is completely incorporated and there aren’t any dry pockets before measuring it.
Recipe Variations
Once you have the basic peanut butter pie down, there are a couple of easy ways to adapt it while keeping that creamy filling at the center.
Try Chocolate Teddy Grahams
If you can’t find chocolate graham crackers, Chocolate Teddy Grahams can take their place in the crust.
Add Whipped Cream
Want an even softer, creamier finish? Add a layer of homemade whipped cream to the chilled pie.
For the optional whipped cream topping, use:
- 1 cup (240 grams) chilled heavy cream
- 2 tablespoons (15 grams) powdered sugar
- 1 teaspoon vanilla extract
In a medium bowl, use an electric mixer fitted with the whisk attachment to beat the cream on medium speed until it starts to thicken, about 1 minute. Add in the sugar and vanilla and continue whipping until stiff peaks form, about 1 more minute. Spread the whipped cream over the chilled pie.
Make It with Almond Butter
If peanuts are off the table, almond butter is an easy variation.
Use the same amount of almond butter as peanut butter in the recipe. Add 2 teaspoons of vanilla extract to the cream cheese, powdered sugar, and almond butter filling (still adding the 1 teaspoon of vanilla extract to the heavy cream mixture as well).
For the toppings, skip the Reese’s cups and peanut butter chips and instead garnish with almond butter cups and melted chocolate, or any other toppings of your choice.
Storage & Reheating
One of my favorite things about this pie is how well it works as a make-ahead dessert.
In the refrigerator: Cover the pie and refrigerate it for up to 3 days. Serving it from the fridge gives the filling a soft, creamy texture.
In the freezer: Wrap the pie tightly in plastic wrap and freeze it for up to 1 month. You can serve it frozen for a firmer texture or let it thaw overnight in the refrigerator.
And no reheating here! Peanut Butter Pie is meant to be enjoyed cold, straight from the refrigerator or freezer.
Serving Suggestions
I like this pie best when the toppings make it obvious exactly what you’re about to eat. A generous drizzle of melted peanut butter and chocolate, a handful of peanut butter chips, and mini Reese’s cups scattered over the top are all it really needs.
Serve it chilled when you want the filling soft and mousse-like, or frozen for a firmer, colder slice. Either way, the crunchy chocolate crust gives you a nice contrast to all that creamy peanut butter filling.
Because you can make it ahead, this is a particularly handy dessert for birthdays, holiday dinners, potlucks, or any meal where you’d rather have dessert waiting in the fridge than make something at the last minute.
And if you’re serving a crowd of chocolate-and-peanut-butter fans, don’t count on leftovers.
Recipe FAQs
1. Do I really need to bring the cream cheese to room temperature?
Yes. Room-temperature cream cheese mixes much more easily with the peanut butter and powdered sugar and helps give you a smooth, creamy filling. If the cream cheese is too cold, you may end up with little lumps that are difficult to beat out.
2. How do I know when the heavy cream has reached stiff peaks?
Lift the whisk out of the whipped cream and look at the peak. If it stands upright and holds its shape, it’s ready. Make sure not to keep whipping much longer after this point or the cream can start to become grainy.
3. Can I use natural peanut butter?
Yes, you can use natural peanut butter, but make sure it is very well stirred before adding it to the filling. There shouldn’t be any oil sitting on top or dry peanut butter at the bottom. For the easiest and most consistent results, conventional creamy peanut butter works great.
4. Why does the chocolate crust need to cool completely?
You don’t want to add the creamy filling to a warm crust. The heat can soften the filling and make it take longer to set. Let the crust cool completely on a wire rack, then add the peanut butter filling.
5. Should I refrigerate or freeze the peanut butter pie?
Either works! Freeze the pie for 3 hours if you want a firmer texture, or refrigerate it for at least 6 hours for a softer, creamier slice. Just make sure you give it the full chilling time so the filling has a chance to set properly.
Homemade Peanut Butter Pie
Ingredients
For the crust
- 14 whole (196 grams) chocolate graham crackers
- 1 tbsp light brown sugar
- 7 tbsp (99 grams) unsalted butter, melted
For the filling
- 8 ounces (227 grams) cream cheese, at room temperature
- 3/4 cup (94 grams) powdered sugar plus 2 tablespoons, divided
- 1 cup (270 grams) creamy conventional peanut butter
- 1 cup (240 grams) heavy whipping cream
- 1 tsp vanilla extract
For the topping
- Melted peanut butter
- Melted chocolate
- Mini Reese’s cups
- Peanut butter chips
Instructions
- Preheat the oven to 325°F.
Prepare the crust
- Add the chocolate graham crackers and light brown sugar to a food processor. Process until the crackers have become fine crumbs.
- Pour in the melted butter and pulse until the crumbs are evenly moistened.
- Transfer the mixture to a 9-inch pie plate. Using the bottom of a measuring cup, glass, or ramekin, firmly press the crumbs across the base and up the sides of the plate.
- Bake for approximately 10 to 12 minutes, or until the crust smells fragrant. Transfer the pie plate to a wire rack and allow the crust to cool completely.
Make the peanut butter filling
- Place the softened cream cheese, 3/4 cup powdered sugar, and peanut butter in a large bowl. Using an electric mixer, beat for approximately 3 minutes, until the mixture becomes light and fluffy.
- In a separate bowl, use an electric mixer fitted with the whisk attachment to whip the heavy cream until it becomes thick and light.
- Add the remaining 2 tablespoons powdered sugar and the vanilla extract. Continue whipping until the cream forms stiff peaks.
- Carefully fold the whipped cream into the peanut butter mixture until combined.
- Spoon the filling into the cooled pie crust and spread it evenly. Freeze for 3 hours, or refrigerate for at least 6 hours.
Decorate and serve
- Transfer the melted peanut butter and melted chocolate into separate resealable bags or piping bags. Cut a very small opening from the corner or tip of each bag.
- Gently squeeze the bags to drizzle the peanut butter and chocolate across the surface of the pie. Finish with mini Reese’s cups and peanut butter chips.
- Serve the pie either frozen or refrigerated.
Notes
Recipe Notes
Nutrition
Calories: 565kcal | Carbohydrates: 43g | Protein: 10g | Fat: 42g | Saturated Fat: 19g | Cholesterol: 69mg | Sodium: 317mg | Potassium: 305mg | Fiber: 3g | Sugar: 27g | Vitamin A: 769IU | Vitamin C: 0mg | Calcium: 67mg | Iron: 2mg Nutrition is an estimate and can vary depending on the brands and the amounts of melted chocolate, peanut butter, Reese’s cups, and peanut butter chips used for topping.